
Essential Testing Tools for Car Audio Systems
Learn how to test car audio systems like a pro using oscilloscopes, RTAs, and SPL meters. Expert guide with step-by-step instructions and top equipment recommendations.
Testing your car audio system properly can mean the difference between mediocre sound and an exceptional listening experience. Whether you’re troubleshooting distortion, setting amplifier gains, or optimizing frequency response, using the right diagnostic tools is essential for achieving professional-grade results. This comprehensive guide reveals the exact testing methods used by audio professionals to diagnose and perfect car audio systems.
Professional car audio testing requires three fundamental instruments that work together to provide a complete picture of your system’s performance. Each tool serves a specific purpose in diagnosing and optimizing different aspects of your audio setup.
The Oscilloscope: Your Window to Audio Signals
An oscilloscope displays electrical signals as visual waveforms, making it the most critical tool for detecting distortion and setting proper gain levels. By showing you exactly how audio signals look as they travel through your system, oscilloscopes reveal problems that are impossible to detect by ear alone.
The oscilloscope excels at several crucial testing functions:
- Detecting clipping before it becomes audible
- Measuring voltage and signal amplitude
- Setting amplifier gains precisely
- Identifying ground loops and noise
- Verifying crossover settings
When selecting an oscilloscope for car audio work, bandwidth and sampling rate determine accuracy. For most automotive audio applications, a scope with at least 20MHz bandwidth and 20MS/s (Million Samples per Second) sampling rate provides sufficient resolution. The ability to see waveforms in real-time helps identify intermittent problems that other tools might miss.
Real-Time Analyzers: Frequency Response Mapping
A Real-Time Analyzer (RTA) uses a calibrated microphone to measure and display the frequency response of your entire audio system. This tool reveals exactly which frequencies are too loud or too quiet, allowing precise equalization adjustments.
RTAs display sound across the audible spectrum (20Hz-20kHz) as a visual graph, making it easy to identify:
- Frequency peaks and nulls caused by vehicle acoustics
- Speaker response irregularities
- Subwoofer integration issues
- Standing wave problems
The most effective RTAs for car audio testing include presets for common measurement microphones and the ability to display results in various resolutions (1/3, 1/6, or 1/12 octave). When combined with pink noise test signals, an RTA provides objective data about your system’s actual performance rather than relying on subjective listening alone.
SPL Meters: Measuring Sound Pressure Levels
Sound Pressure Level (SPL) meters quantify exactly how loud your system plays, expressed in decibels (dB). Understanding SPL measurements helps you:
- Ensure safe listening levels
- Compare speaker efficiency
- Verify amplifier power output
- Document system performance
Professional SPL meters designed for car audio can measure from 30dB to over 130dB, covering everything from quiet background levels to competition-grade systems. The relationship between power and SPL follows predictable patterns – every 3dB increase requires double the amplifier power, while a 10dB increase sounds approximately twice as loud to human ears.
Step-by-Step Oscilloscope Testing Procedure
Setting up your car audio system correctly requires methodical testing at each stage. Here’s the professional approach to using an oscilloscope for optimal results.
Initial Setup and Safety
Before connecting any test equipment, ensure your system is powered off and all gains are set to minimum. Connect the oscilloscope ground lead to a solid chassis ground point – this prevents ground loops that can damage equipment or provide false readings. When testing amplifier outputs, always use proper load resistors matched to your speaker impedance to avoid damage.
Set your oscilloscope to:
- AC coupling mode
- 10V/division vertical scale (adjust as needed)
- 1ms/division horizontal scale for audio frequencies
- Single channel display initially
Finding the Head Unit’s Maximum Clean Output
Start by disconnecting the RCA cables from your amplifier and connecting them to your oscilloscope inputs. Play a 1kHz test tone at 0dB through your head unit with all EQ settings flat and loudness features disabled.
Gradually increase the volume while watching the sine wave on your scope. The moment you see any flattening at the peaks of the wave, you’ve reached the clipping point. Back the volume down until the sine wave returns to a smooth, rounded shape – this is your head unit’s maximum clean volume setting.
Professional installers at top car audio shops always determine this reference point first, as it establishes the foundation for all subsequent gain settings.
Setting Amplifier Gains Correctly
With your head unit volume at 75% of the maximum clean level, reconnect your amplifiers and attach the oscilloscope probes to the speaker outputs. Use these test frequencies:
- 50Hz at -3dB for subwoofers
- 1kHz at -3dB for midrange speakers
- 3.5kHz at -3dB for tweeters
Slowly increase each amplifier’s gain while monitoring the output waveform. Stop immediately when you observe any waveform distortion. This ensures your amplifiers never clip during normal listening, preserving sound quality and protecting your speakers.
Professional RTA Testing Techniques
Real-time analysis requires careful microphone placement and proper test signals for accurate results. Position your measurement microphone at the primary listening position – typically at ear height in the driver’s seat.
Pink Noise Testing
Pink noise contains equal energy per octave across the frequency spectrum, making it ideal for RTA measurements. Play pink noise through your system at a moderate volume (75-85dB) and observe the frequency response curve.
A well-tuned system shows a relatively flat response with a gentle downward slope from low to high frequencies. Significant peaks or dips indicate acoustic problems that need addressing through equalization or speaker positioning changes.
Expert installers who specialize in high-end audio systems use multiple microphone positions to ensure consistent performance throughout the vehicle.
Identifying and Correcting Frequency Issues
Common frequency response problems in vehicles include:
- 60-80Hz boom from standing waves
- 200-400Hz muddiness from door panel resonances
- 2-4kHz harshness from reflective surfaces
Address these issues systematically, starting with speaker positioning and acoustic treatments before relying heavily on equalization. Small adjustments often yield significant improvements.
Advanced SPL Measurement Strategies
Accurate SPL measurements require understanding microphone placement and weighting curves. Most car audio SPL meters use C-weighting, which provides relatively flat response down to 30Hz – essential for measuring subwoofer output accurately.
Competition-Grade Measurements
For serious SPL testing:
- Seal all windows and doors
- Place the meter at the loudest point (usually windshield center)
- Use burp tones at your system’s peak frequency
- Allow equipment to cool between measurements
Remember that SPL measurements above 120dB can cause permanent hearing damage – always use appropriate hearing protection during high-level testing.
Top Testing Equipment Recommendations
Based on extensive research and professional reviews, these products deliver exceptional performance for car audio testing:
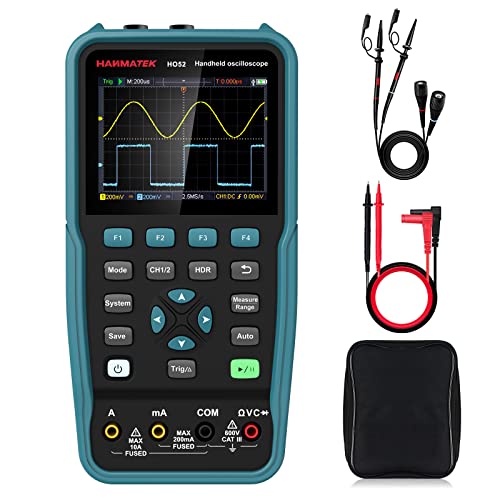
HANMATEK HO52 Handheld Oscilloscope
This compact oscilloscope offers outstanding value with its 3.5-inch display and intuitive controls. With 50MHz bandwidth and dual-channel capability, it handles all car audio testing needs. The fast boot time (under 1 second) and rechargeable battery make it perfect for mobile installations. Users praise its clear waveform display and accurate measurements at an affordable price point.
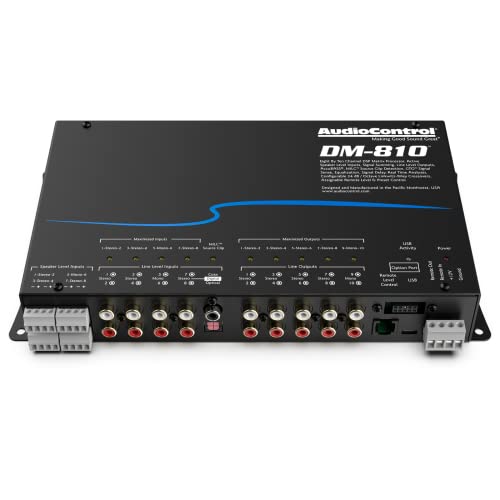
AudioControl DM-RTA Professional Analyzer
The DM-RTA combines five essential tools in one compact unit: voltmeter, RTA, SPL meter, polarity tester, and oscilloscope. This professional-grade instrument connects via USB or Bluetooth to smartphones and computers, providing comprehensive analysis capabilities. With balanced XLR inputs, phantom power for measurement microphones, and speaker-level inputs up to 300 watts, it’s the ultimate all-in-one solution for serious installers.
TopTes TS-501A Digital SPL Meter
Featuring A-weighted measurement from 30-130dB, this meter provides laboratory-grade accuracy at a fraction of the cost. The backlit LCD screen, MAX/MIN memory function, and compact design make it ideal for car audio applications. With over 10,000 positive reviews, it’s proven reliable for both professional installers and enthusiasts.

ZOYI ZT-702S Portable Oscilloscope Multimeter
This 3-in-1 device combines oscilloscope, multimeter, and signal generator functions in a handheld package. The 50MHz bandwidth and 250MS/s sampling rate exceed requirements for audio testing, while the 4.3-inch touchscreen provides excellent visibility. Battery operation and protective rubberized casing ensure durability in automotive environments.

Galaxy Audio CM-130 SPL Meter
Trusted by professionals for its accuracy and reliability, the CM-130 measures 30-130dB with C-weighting for accurate low-frequency response. When calibrated properly, it rivals meters costing ten times more. The sturdy construction and consistent readings make it a favorite among competition sound quality judges.

Troubleshooting Common Audio Problems
Understanding how to interpret test results helps quickly identify and resolve issues:
Distortion at Low Volumes
If your oscilloscope shows distortion even at low amplifier gains, check for:
- Incorrect input sensitivity settings
- Damaged RCA cables
- Failed amplifier components
- Ground loop interference
Uneven Frequency Response
When RTA measurements reveal dramatic peaks and valleys:
- Verify speaker polarity using phase testing
- Check crossover settings overlap
- Inspect door seals and mounting integrity
- Consider acoustic treatment options
Professional audio system designers emphasize that proper installation prevents most frequency response issues.
Insufficient Output Levels
If SPL measurements fall short of expectations:
- Confirm impedance matching
- Verify power and ground wire gauge
- Test voltage at amplifier terminals under load
- Check for blown voice coils
Integration with Modern DSP Systems
Digital Signal Processors have revolutionized car audio tuning, but proper testing remains essential. Use your oscilloscope to verify DSP output signals remain clean after processing. RTAs help visualize the effects of time alignment and equalization adjustments in real-time.
Modern DSPs often include built-in testing capabilities, but external measurement tools provide unbiased verification of actual performance. This dual approach ensures optimal results.
Professional Installation Best Practices
Top installers follow these testing protocols:
- Document baseline measurements before any modifications
- Test at multiple volume levels to ensure consistent performance
- Verify all connections under dynamic conditions
- Retest after break-in periods
Regular testing identifies problems before they cause damage, saving money and preserving system performance long-term.
Understanding Test Equipment Specifications
When investing in testing tools, prioritize these specifications:
For Oscilloscopes:
- Minimum 20MHz bandwidth
- At least 2 channels
- USB connectivity for data logging
- Battery operation capability
For RTAs:
- 1/3 octave resolution minimum
- Calibrated microphone compatibility
- Real-time display updates
- Data export functions
For SPL Meters:
- C-weighted response
- 30-130dB measurement range
- ±1.5dB accuracy or better
- Fast/slow response options
This comprehensive video demonstrates proper oscilloscope setup and gain adjustment procedures used by professional installers.
Future of Car Audio Testing
Emerging technologies continue advancing testing capabilities. Smartphone-based RTA apps now rival dedicated hardware for basic measurements. Wireless connectivity enables real-time adjustments while listening from the driver’s seat. However, dedicated test equipment remains essential for professional results and accurate documentation.
The Best Car Sound System in the World
Conclusion
Mastering car audio testing equipment transforms your ability to achieve exceptional sound quality. Whether you’re setting gains with an oscilloscope, analyzing frequency response with an RTA, or measuring output with an SPL meter, proper testing eliminates guesswork and ensures optimal performance.
Invest in quality testing tools appropriate for your needs and skill level. Start with basic measurements and gradually expand your testing repertoire as you gain experience. Remember that even professional installers continually refine their techniques – audio system optimization is an ongoing journey toward sonic perfection.
Regular testing and documentation help maintain peak performance while identifying issues before they become serious problems. With the right tools and knowledge, you can achieve professional-grade results that rival any high-end installation facility.
Related Posts
- Stop Car Door Rattling from Speakers: 7 Proven Fixes That Actually Work
- The Complete Guide to Choosing the Perfect Car Stereo System
- Infinity Reference vs Kappa: Which Car Speakers Deliver Superior Sound Quality?
- Car Leasing vs Buying: Complete Guide to Vehicle Leasing Benefits in 2025
- Best 4‑Channel Car Amplifiers for Crystal‑Clear Sound in Any Vehicle