
Quick Fixes for Motorcycle Batteries That Won’t Hold Charge
Discover why your motorcycle battery dies quickly with our step-by-step diagnosis guide. Learn testing methods, common causes, and proven solutions to keep your bike running reliably.
A motorcycle battery that dies after just a few months can be incredibly frustrating, especially when you’re expecting years of reliable service. While older batteries naturally lose capacity over time, newer batteries that drain quickly indicate underlying electrical system problems that require immediate attention.
Modern motorcycle batteries should maintain charge for weeks when stored properly. When they don’t, the culprit is usually one of five common issues: a defective battery, faulty charging system, parasitic drain, excessive accessories, or damaged wiring. Each problem has specific symptoms and testing procedures that can help you identify the exact cause.
Understanding Your Motorcycle’s Charging System
Your motorcycle’s electrical system operates through three interconnected components that work together to keep your battery charged and your bike running smoothly.
The battery serves as the primary power source for starting your engine, providing the initial surge of current needed to turn over the motor. Once running, the alternator (or stator in most motorcycles) takes over, generating alternating current (AC) to power your bike’s electrical systems while simultaneously recharging the battery.
The rectifier-regulator converts this AC power into direct current (DC) that your battery and electrical components can use. It also prevents overcharging by regulating the voltage output to safe levels, typically maintaining between 13.5-14.8 volts during operation.
When any of these components fail, your battery either won’t receive adequate charge or will drain faster than normal, leading to the frustrating cycle of dead batteries and failed starts.
5 Common Causes of Fast Battery Drain
1. Defective Battery Cells
Even brand-new batteries can have internal defects that prevent them from holding a full charge. Manufacturing flaws, improper storage, or shipping damage can compromise battery cells before you even install them.
Testing Method: Use a digital multimeter set to DC voltage. With the engine off, a healthy 12-volt battery should read between 12.4-12.8 volts. Readings of 12.0 volts or lower indicate a weak or failing battery that needs replacement.
For precise diagnostic testing, the Klein Tools MM420 Digital Multimeter stands out as an excellent choice for motorcycle battery testing. This True RMS auto-ranging multimeter measures AC/DC voltage, AC/DC current, resistance, temperature, capacitance, and frequency with exceptional accuracy. Designed exclusively by electricians for electricians through years of field research, its auto-ranging feature eliminates guesswork when switching between voltage ranges, making battery testing straightforward even for beginners.

19/06/2026 5:50 am
If your initial reading is low, charge the battery with a quality battery tender for several hours, then retest. If the voltage doesn’t improve to at least 12.4 volts, the battery has internal damage and requires replacement.
2. Charging System Failure
A malfunctioning alternator or stator won’t provide sufficient power to recharge your battery during operation, leading to gradual discharge over time.
Testing Procedure: With your multimeter connected to the battery terminals, start the engine and let it idle. You should see voltage readings around 13.5 volts at idle. Rev the engine to 3,000 RPM – voltage should increase to approximately 14.5 volts. Quick throttle blips should produce readings near 14.8 volts.
Readings significantly below these ranges indicate charging system problems. Zero voltage during testing points to complete alternator or regulator-rectifier failure. Understanding how motorcycle batteries charge while idling can help you recognize when your charging system isn’t performing correctly.
For professional-grade charging system analysis, the Fluke 117 Electricians True RMS Digital Multimeter provides exceptional accuracy and reliability. Its low input impedance mode prevents false readings caused by ghost voltage, while non-contact voltage detection adds safety during testing. The auto-ranging feature and True RMS capability ensure precise measurements even with irregular waveforms from motorcycle charging systems.

19/06/2026 5:50 am
3. Parasitic Electrical Drain
Some electrical components continue drawing power even when your motorcycle is turned off. While minimal drain is normal, excessive draw will deplete your battery within days or weeks.
Detection Steps: Remove the negative battery cable and place your multimeter (set to measure current) between the negative terminal and the disconnected cable. Normal parasitic draw should be less than 0.5 amps. Readings of 1 amp or higher indicate problematic drain that needs investigation.
Systematically disconnect fuses for different electrical circuits while monitoring the multimeter reading. When the current drops significantly, you’ve identified the circuit causing excessive drain.
The ANCEL BM300 Pro Bluetooth Battery Monitor revolutionizes parasitic drain detection with continuous monitoring capabilities. This waterproof IP67-rated device monitors 6V, 12V, and 24V systems while providing real-time alerts through Bluetooth connectivity to your smartphone. Its advanced features include charging system testing, cranking system analysis, and customizable alarms that warn you before parasitic drain becomes critical.

19/06/2026 5:50 am
4. Accessory Overload
Adding aftermarket accessories like heated grips, auxiliary lights, GPS units, or sound systems increases electrical demand beyond your charging system’s capacity.
Modern motorcycles have limited electrical output compared to cars. While a typical car alternator produces 60-120 amps, motorcycle charging systems often generate only 10-30 amps. Each accessory reduces available power for battery charging.
Solution: Calculate total accessory draw and compare it to your bike’s charging capacity. Consider upgrading to a higher-output stator or removing some accessories if the load exceeds system capability. Installing a voltmeter allows real-time monitoring of electrical system performance.
The CoolschMax 12V Battery Capacity Voltage Meter provides continuous monitoring of your electrical system’s performance with its waterproof IP67 design and LED backlight display. This precision instrument displays real-time voltage readings, helping you identify when accessories are overloading your charging system. Its compact design mounts easily on handlebars or dash panels, making it perfect for tracking electrical loads during rides.

19/06/2026 5:50 am
5. Damaged Wiring and Connections
Worn, damaged, or corroded wiring creates resistance that reduces charging efficiency and can cause direct power loss. Common problem areas include connections near the exhaust system, steering head, and under the seat where vibration and heat take their toll.
Inspection Process: Examine every wire in the main harness, looking for cracked insulation, exposed copper, or green corrosion around connections. Pay special attention to ground connections, as poor grounding can mimic battery problems.
Clean all connections with electrical contact cleaner and apply dielectric grease to prevent future corrosion. Replace any damaged wiring with the same gauge wire to maintain proper current capacity.
Professional Testing Tools and Techniques
Accurate diagnosis requires quality testing equipment. A basic digital multimeter handles most battery and charging system tests, but specialized tools provide more detailed analysis.
Battery load testers apply a controlled electrical load while measuring voltage drop, simulating real-world starting conditions. Professional-grade units can test battery capacity under various load conditions, providing a complete picture of battery health.
Recommended Testing Equipment:
- Digital multimeter with DC voltage and current capability
- Battery load tester rated for your battery’s CCA rating
- Hydrometers for conventional wet-cell batteries
- Infrared thermometers for detecting hot spots in wiring
For riders dealing with recurring battery issues, learning how to revive a dead motorcycle battery can help extend battery life and identify whether replacement is necessary.
Watch: Complete Motorcycle Battery Testing Guide
For visual learners who prefer step-by-step demonstrations, this comprehensive video covers all aspects of motorcycle battery testing and diagnosis:
Motorcycle Battery Testing – This detailed tutorial walks through multimeter usage, charging system testing, and troubleshooting techniques used by professional motorcycle technicians.
Preventive Maintenance Strategies
Preventing battery problems is more cost-effective than replacing batteries frequently. Regular maintenance extends battery life and prevents unexpected failures.
Monthly Checks:
- Test battery voltage with multimeter
- Inspect terminals for corrosion or looseness
- Verify proper electrolyte levels (conventional batteries)
- Clean connections with wire brush if needed
Seasonal Preparation:
- Use battery tenders during storage periods
- Disconnect negative terminal for long-term storage
- Store batteries in temperature-controlled environments
- Perform load testing before riding season
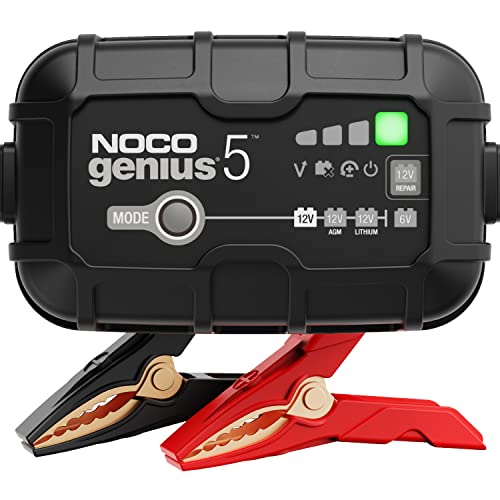
The NOCO Genius G3500 6V/12V 3.5 Amp Battery Charger and Maintainer represents the gold standard for motorcycle battery maintenance. This intelligent charger automatically detects battery type and condition, providing optimal charging profiles for both lead-acid and lithium batteries up to 120Ah capacity. Its advanced safety features include spark-proof technology, reverse polarity protection, and overcharge prevention, making it safe to leave connected indefinitely for long-term battery maintenance.
19/06/2026 5:50 am
Proper storage becomes critical if your motorcycle battery sits unused for extended periods, as even healthy batteries will self-discharge over time.
When to Replace vs. Repair
Sometimes repair costs exceed replacement value, making battery replacement the economical choice. Calculate repair costs against new battery prices before committing to extensive troubleshooting.
Replace When:
- Battery fails load testing repeatedly
- Physical damage like cracked cases or leaking electrolyte
- Age exceeds manufacturer’s recommended service life
- Repair costs approach 70% of replacement cost
Repair When:
- Simple connection cleaning resolves issues
- Charging system problems affect otherwise healthy battery
- Parasitic drain elimination restores normal operation
- Accessory modifications reduce electrical load
Advanced Troubleshooting Techniques
Complex electrical problems may require advanced diagnostic approaches beyond basic multimeter testing.
Oscilloscope Analysis: Professional shops use oscilloscopes to analyze charging system waveforms, identifying intermittent problems that multimeters miss.
Thermal Imaging: Infrared cameras reveal hot spots in wiring that indicate high resistance connections or overloaded circuits.
Computer Diagnostics: Modern bikes with electronic control units may store fault codes that point to specific charging system problems.
Cost-Effective Solutions
Budget-conscious riders can implement several strategies to minimize battery-related expenses while maintaining reliable operation.
DIY Maintenance: Learning basic testing and maintenance procedures eliminates diagnostic fees and reduces repair costs.
Quality Components: Investing in premium batteries and charging components reduces long-term replacement frequency.
Preventive Care: Regular maintenance prevents minor issues from becoming expensive major repairs.
Conclusion
Motorcycle battery problems are usually symptoms of broader electrical system issues rather than battery defects alone. Systematic diagnosis using multimeter testing, visual inspection, and logical troubleshooting reveals the root cause in most cases.
Address charging system problems promptly to prevent battery damage and avoid roadside breakdowns. Regular maintenance and proper testing techniques keep your motorcycle’s electrical system operating reliably for years of trouble-free riding.
Remember that electrical problems often have multiple contributing factors. Thorough diagnosis may reveal several issues that need correction to achieve lasting results.
Related Posts
- Honda Power Steering Fluid: Complete Guide & Best Products for Smooth Steering
- 2019 Morgan Plus 4 110 Anniversary Model: Timeless British Engineering Redefined
- Car Heater Not Working: Complete Diagnosis and Repair Solutions
- P0128 Code: Coolant Temperature Below Thermostat Regulating Temperature
- Best 12V Battery Chargers for Motorhomes